Renewing an SSL certificate is relatively simple. Many web hosts and registrars even go as far as automating the process entirely, so you don’t have to lift a finger. However, if your host doesn’t offer automatic renewals for some reason, I’m going to show you the steps to renew your SSL manually.
In this post, I’ll give you step-by-step instructions on how to renew your site’s SSL certificate, we’ll also talk when you should start the renewal process, go over some provider-specific advice based on where you’re hosting your site, and also talk about the cost of the whole ordeal.
- If your certificate was provided by Let’s Encrypt, it will renew automatically and you don’t have to do anything to make it happen
- If your certificate was provided by another company, check in your cPanel settings if the auto-renew feature is enabled (→ here’s how)
- For certificates that need manual renewal, you can do that by generating a certificate signing request (CSR), activating your certificate with the provider of your choice, and installing it on your hosting setup (→ here’s how)
Can SSL certificates actually expire?
Under the hood, SSL certificates are just small digital files that contain some basic information. Most importantly, they hold: a public key (one half of a cryptographic key pair used for encrypting data), a digital signature created by a certificate authority that issues the certificate to verify its authenticity, details about the domain or organization the certificate is issued to, information about the cryptographic algorithms used, and lastly a mention of the validity period of the certificate.
As you can see, there’s nothing too fancy inside an SSL, but somehow this is all that’s needed to make the communication between your site and its visitors secure. Still, given that SSL certificates are actually just simple text files, there isn’t much that any web browser can do with them other than read what’s inside and decide if the contents is still valid.
For that reason, as soon as the validity period coded into the certificate expires, the whole certificate is rejected and web browsers will inform your readers of this in a quite dramatic manner. This can be pretty problematic for you, since not a lot of visitors will soldier through when they see a notice like this:

Okay, so why do those things have to expire? Can’t they stay valid forever? I hear you, but here’s the thing:
SSL certificates expire for a few good reasons:
- To stay safe: Newly generated certificates use the latest security tricks to keep your website protected. This is basically an equivalent of you changing your passwords regularly.
- To use new keys: Each time an SSL renews it generates new cryptographic keys, reducing the risk of compromise from long-term use of the same keys.
- To check that you still own the website: It’s a way to make sure the person renewing the certificate still owns or controls the website.
- To limit problems: If someone impersonates you and steals your certificate, it won’t work forever – just until it expires.
In the end, expiring SSL certificates are simply something that all website owners have to deal with from time to time.
What happens when your SSL expires
The biggest problem with certificates going expired is that Google and all the leading web browsers will insist heavily that the user should not visit such websites. Your visitors seeing a warning like the one in the image above creates a lot of side problems that can spin out of proportion pretty quickly:
- If the visitors are unfamiliar with your website, there’s little likelihood they will dismiss the warning to visit you.
- Even those who already trust you will start second guessing your integrity and whether your site hasn’t perhaps been hacked or faces some other security problems.
- You will naturally start getting less traffic – due to visitors deciding to abandon your site as soon as they see the notice.
- Plus – the purely technical consequence of all this – your site will not encrypt any data sent between your readers and the site itself, meaning that the connection is no longer actually being secure. This is paradise for hackers, and you don’t want that, obviously!
These are just a few reasons why keeping your SSL valid or renewing it when the time’s up is crucial!
When SSL certificates commonly expire
Back in the day, when SSL-ifying websites was still pretty novel and SSL certificates were expensive, it wasn’t uncommon for certificates to stay valid for three to even five years. Since you had to configure them each time purely by hand, it was simpler to avoid that as much as possible and keep those periods as long as possible.
It was a convenient approach for sure, but not optimal from a security standpoint. This kept evolving over the years, and at some point stopped at “two years” to be a common validity period for SSLs. However, as of September 2020, the recommended issuing period was shortened again to roughly 13 months, which was a significant reduction compared to the previous standards.
These days, some certificates last for up to those 13 months (or 398 days exactly), whereas others have expiry dates as low as 90 days (we’re looking at you Let’s Encrypt). For many, these expiration dates can be a hassle. One reason the certificate authorities argue that shorter validity periods are necessary is to encourage automation and actually free users of having to worry about renewals entirely.
A lot of web hosts and certificate authorities enable you to automate the renewal process already. It should arguably become the new standard, so we get to enjoy the security benefit of short certificate validity periods without having to process renewals manually.
What to do when you get an SSL expiration email/notice?
Since you’re reading this, you might have received an email similar to the following:

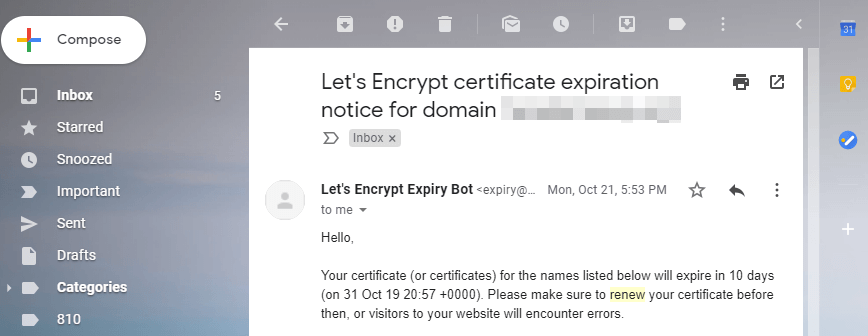
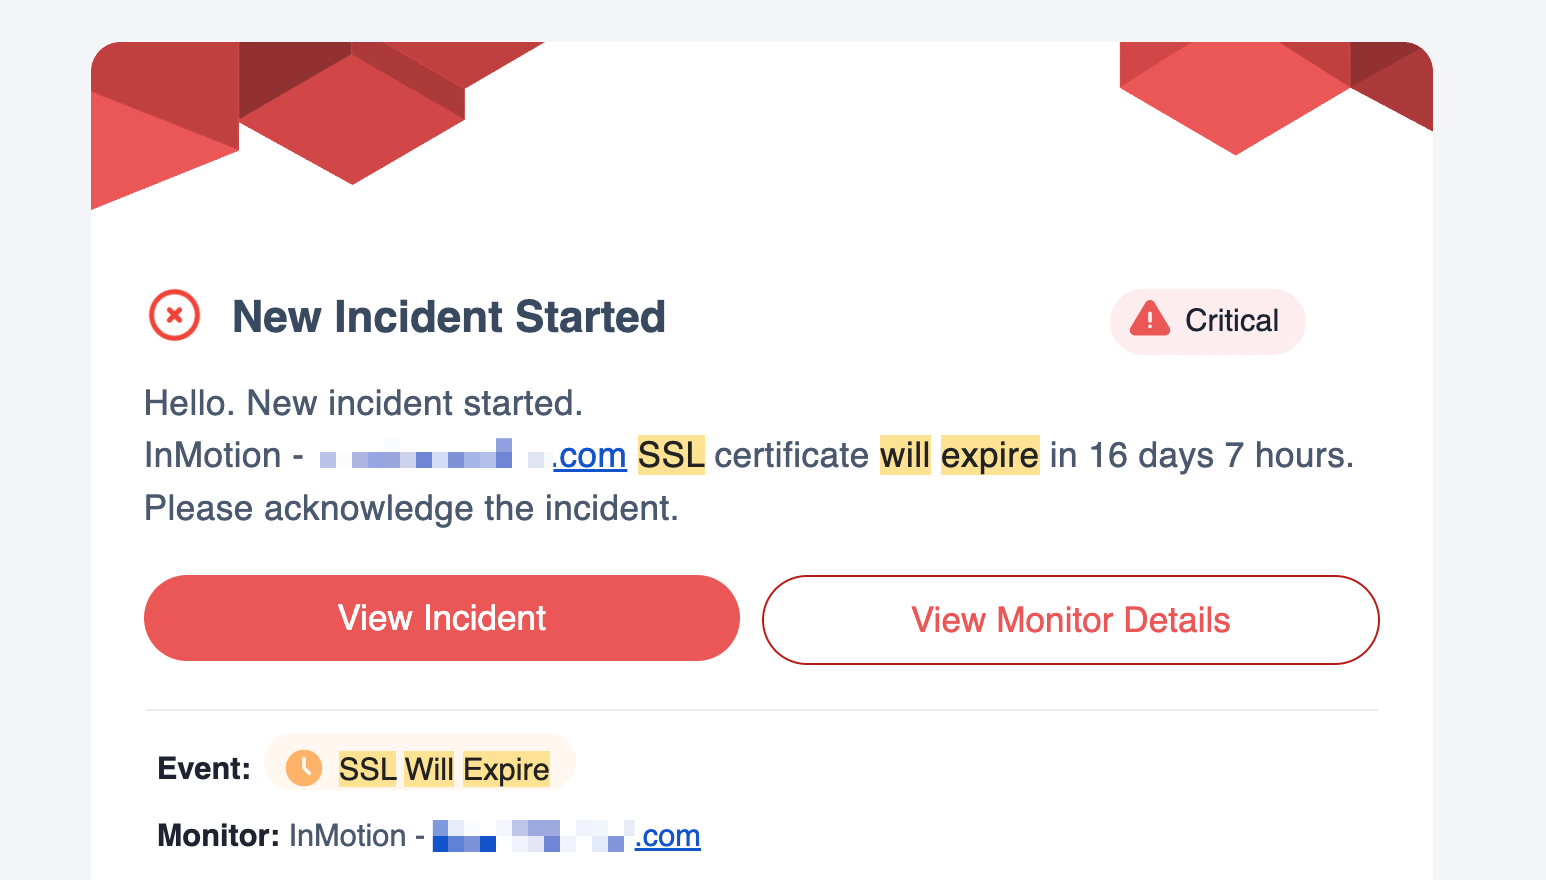
Or maybe like this one – a bit more dramatic:

The first order of business is not to be super-alarmed at this point. The fix is actually not that difficult and nothing bad has happened yet.
Here’s where you can start:
a) Check if your certificate is from Let’s Encrypt
If you’re not familiar with Let’s Encrypt, it is a free, automated certificate authority launched in 2016 with the main purpose of promoting widespread use of SSLs. It simplifies the process of getting SSL certificates, automating most of it. This ease of use, combined with their certificates being 100% free, has quickly made Let’s Encrypt the most popular choice among website owners and hosts, and it has boosted the adoption of HTTPS across the web significantly.
Chances are that if you’re on an entry-level hosting, and you do have an SSL certificate with it, then that certificate is most likely from Let’s Encrypt.
👉 Another perk of having an SSL certificate from Let’s Encrypt is that they will also auto-renew. And the best part is that every host that integrates with Let’s Encrypt does support this auto-renewal feature for their certificates.
To check if your current SSL is from Let’s Encrypt, you can go to cPanel, into SSL/TLS Status, and click on View Certificate next to your domain name:

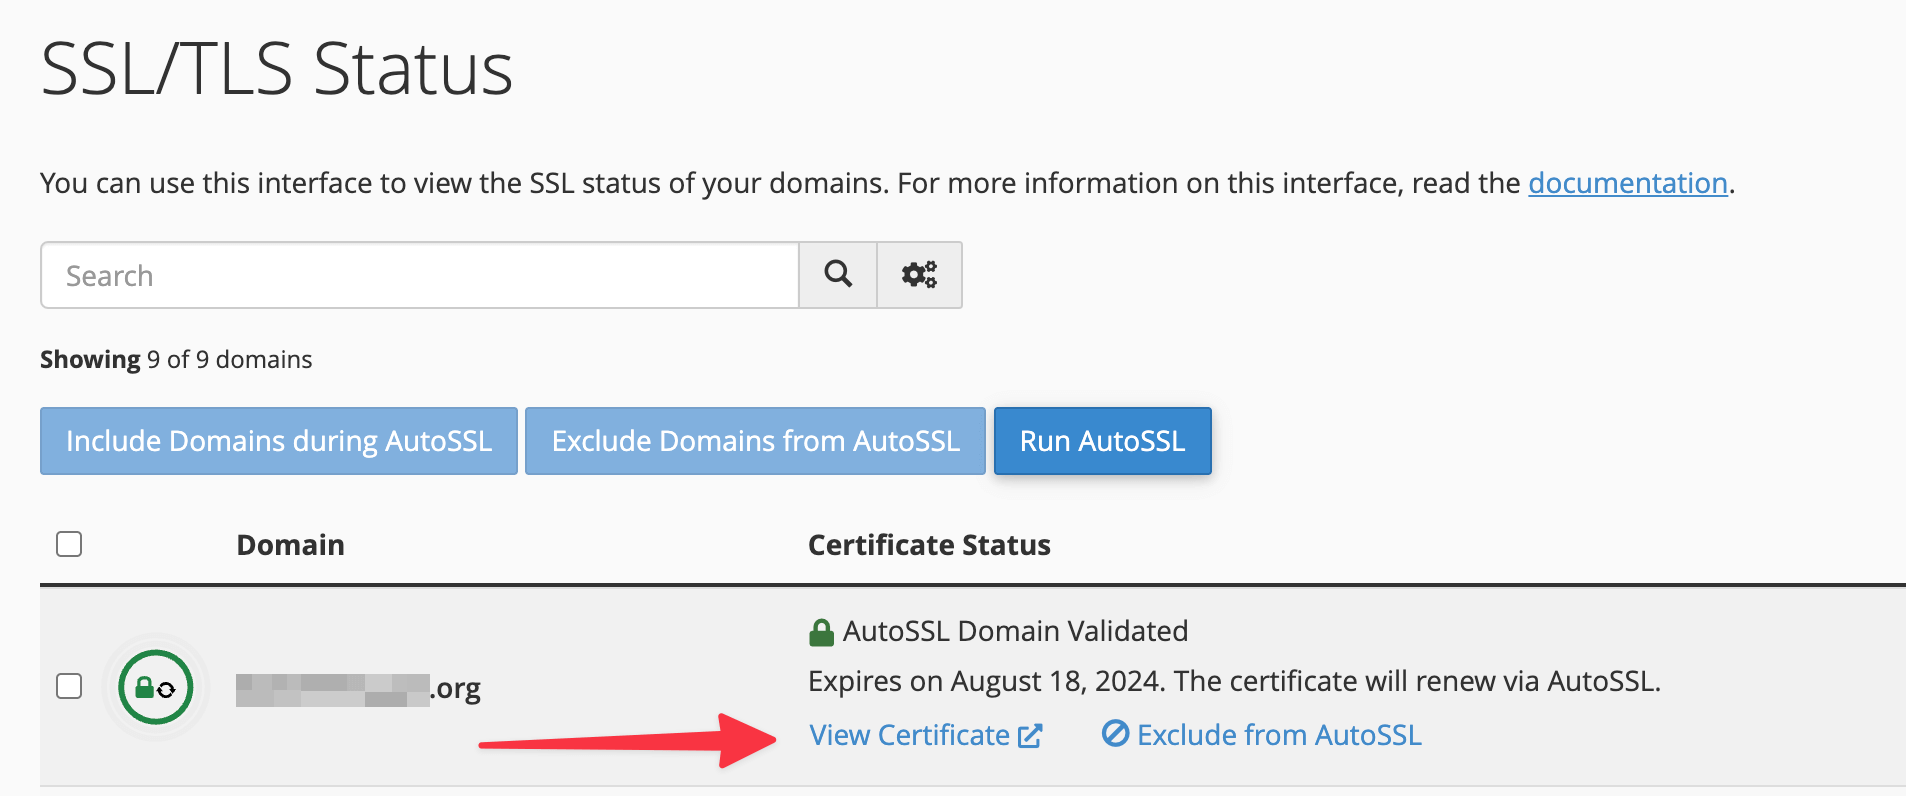
On the next page, you will see this among the certificate details:

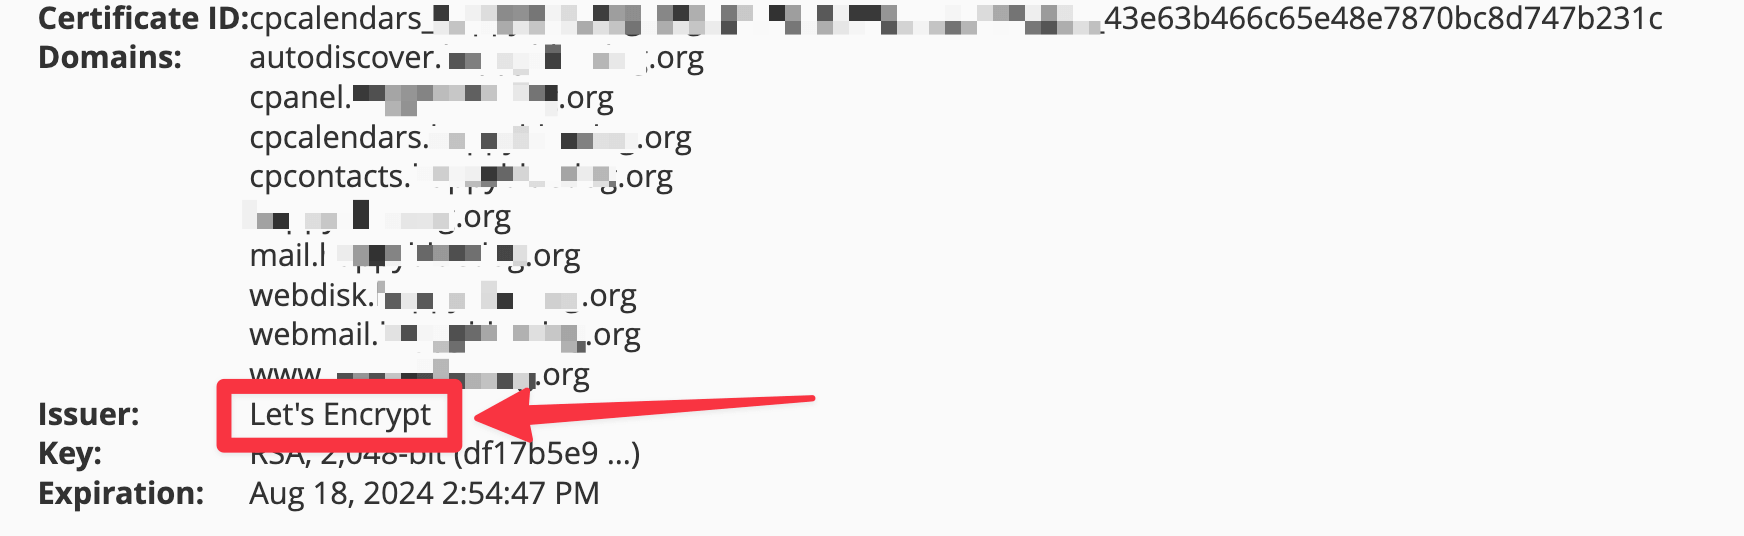
If it says “Let’s Encrypt” there, then you can ignore the rest of this guide, your certificate will renew automatically.
If you’re not sure either how to access cPanel or if your certificate is from Let’s Encrypt, your best bet is to contact the hosting support and ask them.
b) Check if your web host offers automated SSL renewals
If your certificate doesn’t come from Let’s Encrypt, this still doesn’t mean that you won’t be able to have it auto-renew.
Many popular hosts automate renewals of all their SSL certificates so that you don’t have to deal with them at all.
🔥 Here’s a list of some of the top-tier most popular hosts that offer automated SSL renewals already: SiteGround, WP Engine, IONOS, DreamHost, Flywheel, Kinsta, InMotion, A2 Hosting, Hostinger, HostGator, Namecheap, GoDaddy. If you host with any of them, you can expect that your certificate will be auto-renewed when it’s closer to its expiration date (usually around the 14-day mark).
💡 If you host with Bluehost, whether your certificate renews automatically depends on the plan you’re on. Another factor that might come into play is the type of your SSL – free or premium. Some users report their free SSLs require manual renewals while others say they renew automatically with no problems.
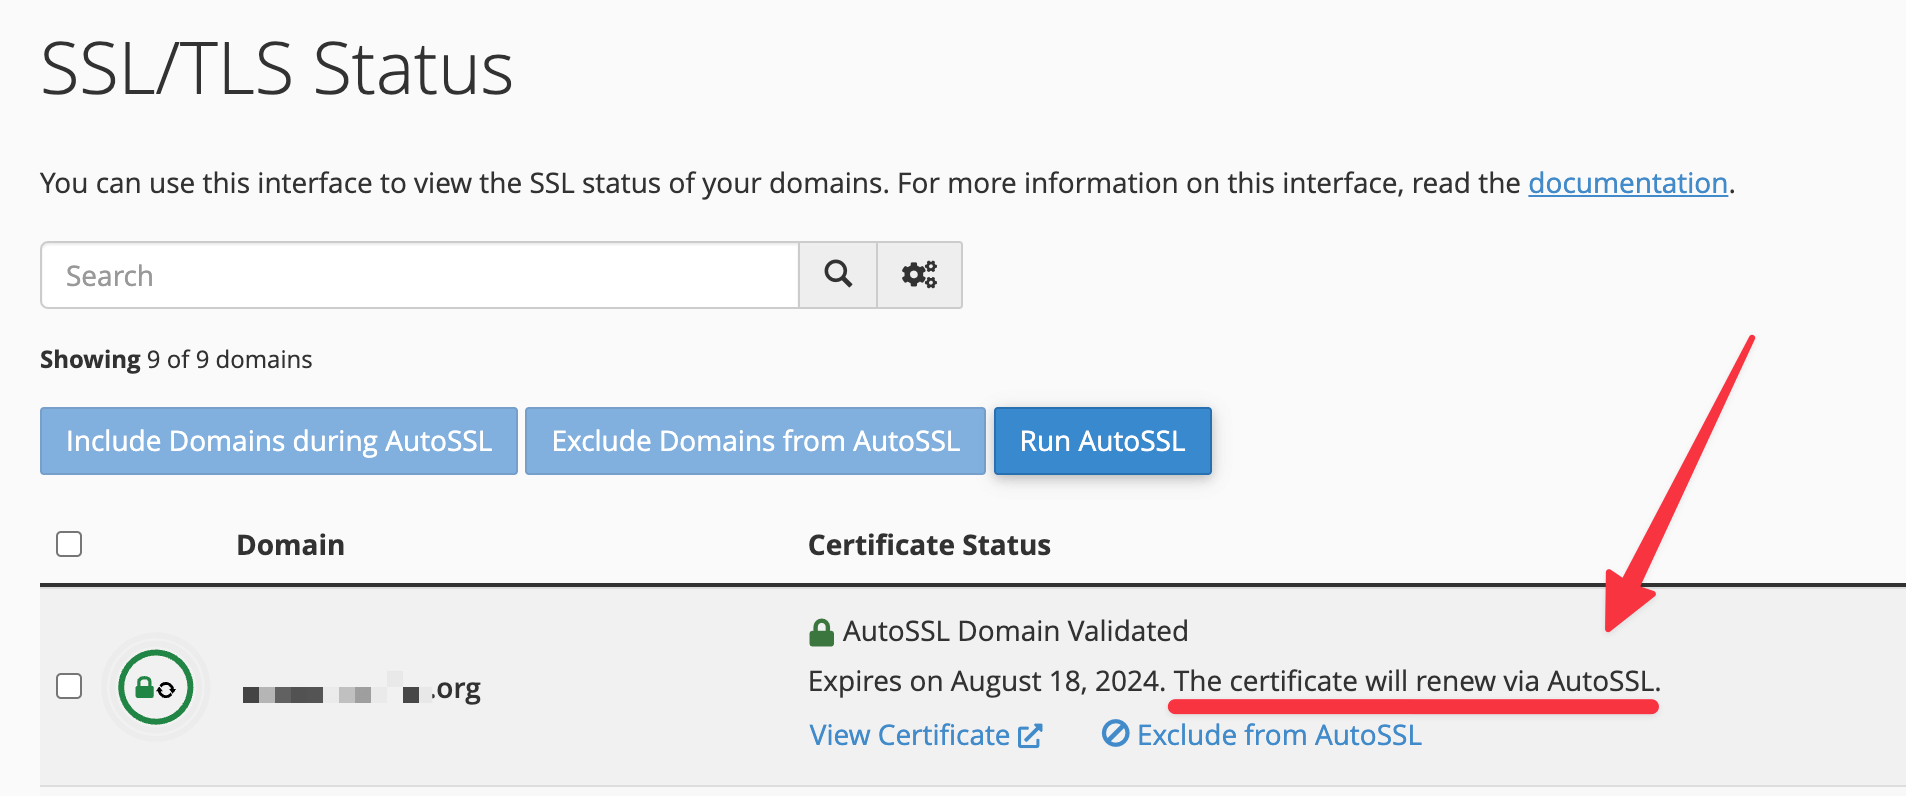
For example, in the case of our test website on Bluehost (the one we use to monitor web host performance), its certificate has been renewing automatically every year on its own. To check if the situation is the same for you, go to your Bluehost dashboard, into Hosting, Security, and then View SSL Logs.

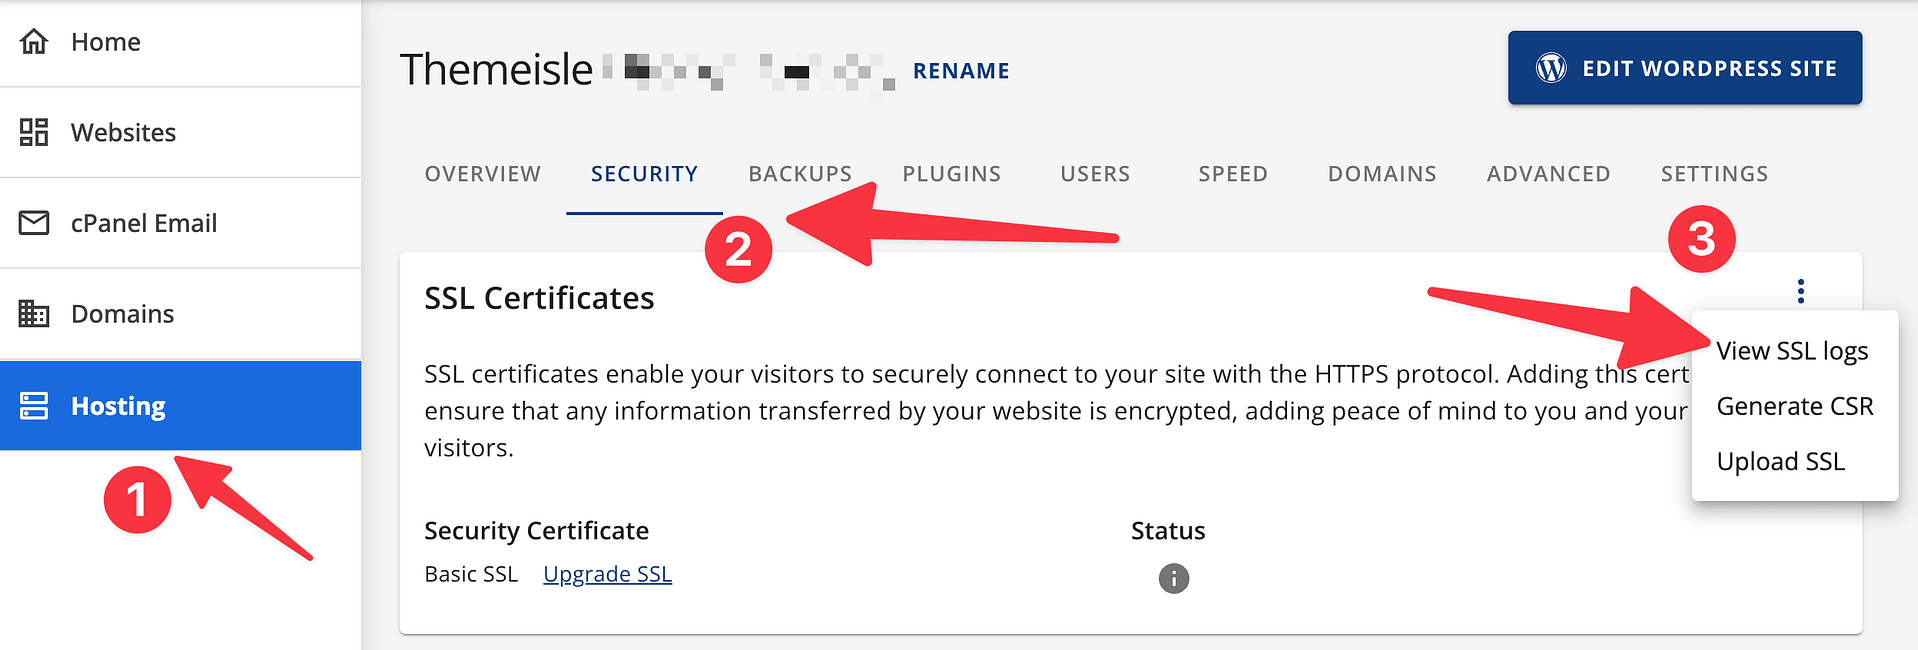
This will land you in cPanel. See if there’s a label that says that your certificate will renew automatically:

If yes, then you can ignore the rest of this guide.
Again, if you can’t find any of these details in your hosting panel, your best path forward is to contact the support chat and ask about whether your SSL certificate will renew automatically or if you have to do something about it.
While you’re at it, ask them how to enable auto-renewals if possible on your setup.
That being said, if you don’t have the option to automate the process, you’ll want to know how to renew your SSL certificate manually. Below, I present the most common method that works with all web hosts based on cPanel (a big majority of them):
How to renew SSL certificate (in just 3 steps)
The process for renewing your SSL certificate may vary a bit depending on what web host or certificate authority you’re using. Even so, the big picture remains the same. You’ll need to: (1) generate a certificate signing request (CSR), (2) get a certificate from a certificate authority, (3) install it on your hosting setup.
For illustration, I’ll show you how to go through a manual SSL certificate renewal using a standard cPanel hosting setup. Most web hosts use this management tool, so it should be fairly universal advice that you will be able to recreate on your setup.
Step #1: Generate a new CSR
The first thing you need to do is generate a CSR from your web host, which validates your server’s identity.
A CSR (Certificate Signing Request) is like a digital application form for an SSL certificate. When a website wants to get a security certificate, it creates this special file containing information about the site and its owner, along with a unique code. Next, this file is sent to a certificate authority, which then uses the information in the CSR to create and sign the SSL certificate.
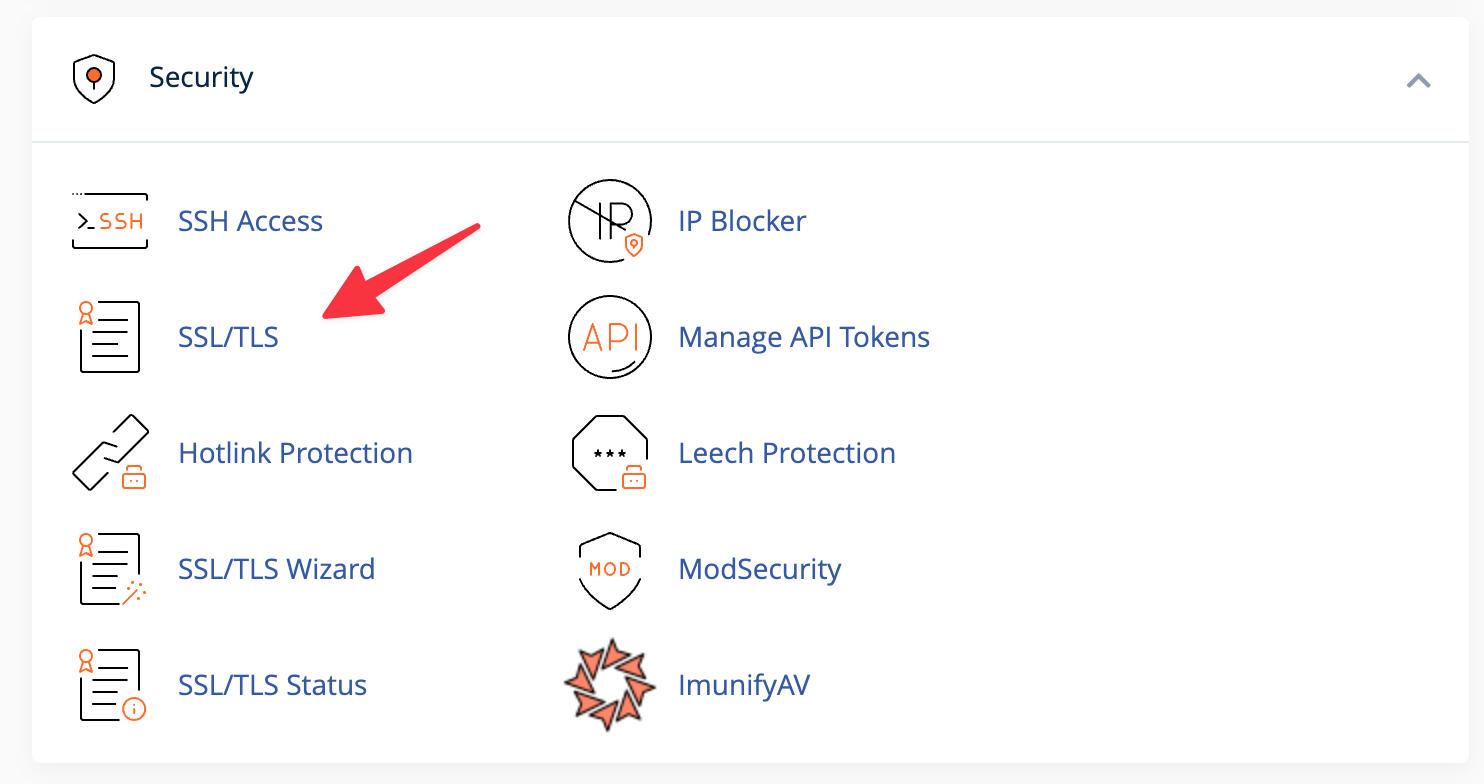
If your hosting provider uses cPanel, you can do this by navigating to the Security tab and looking for the SSL/TLS option:

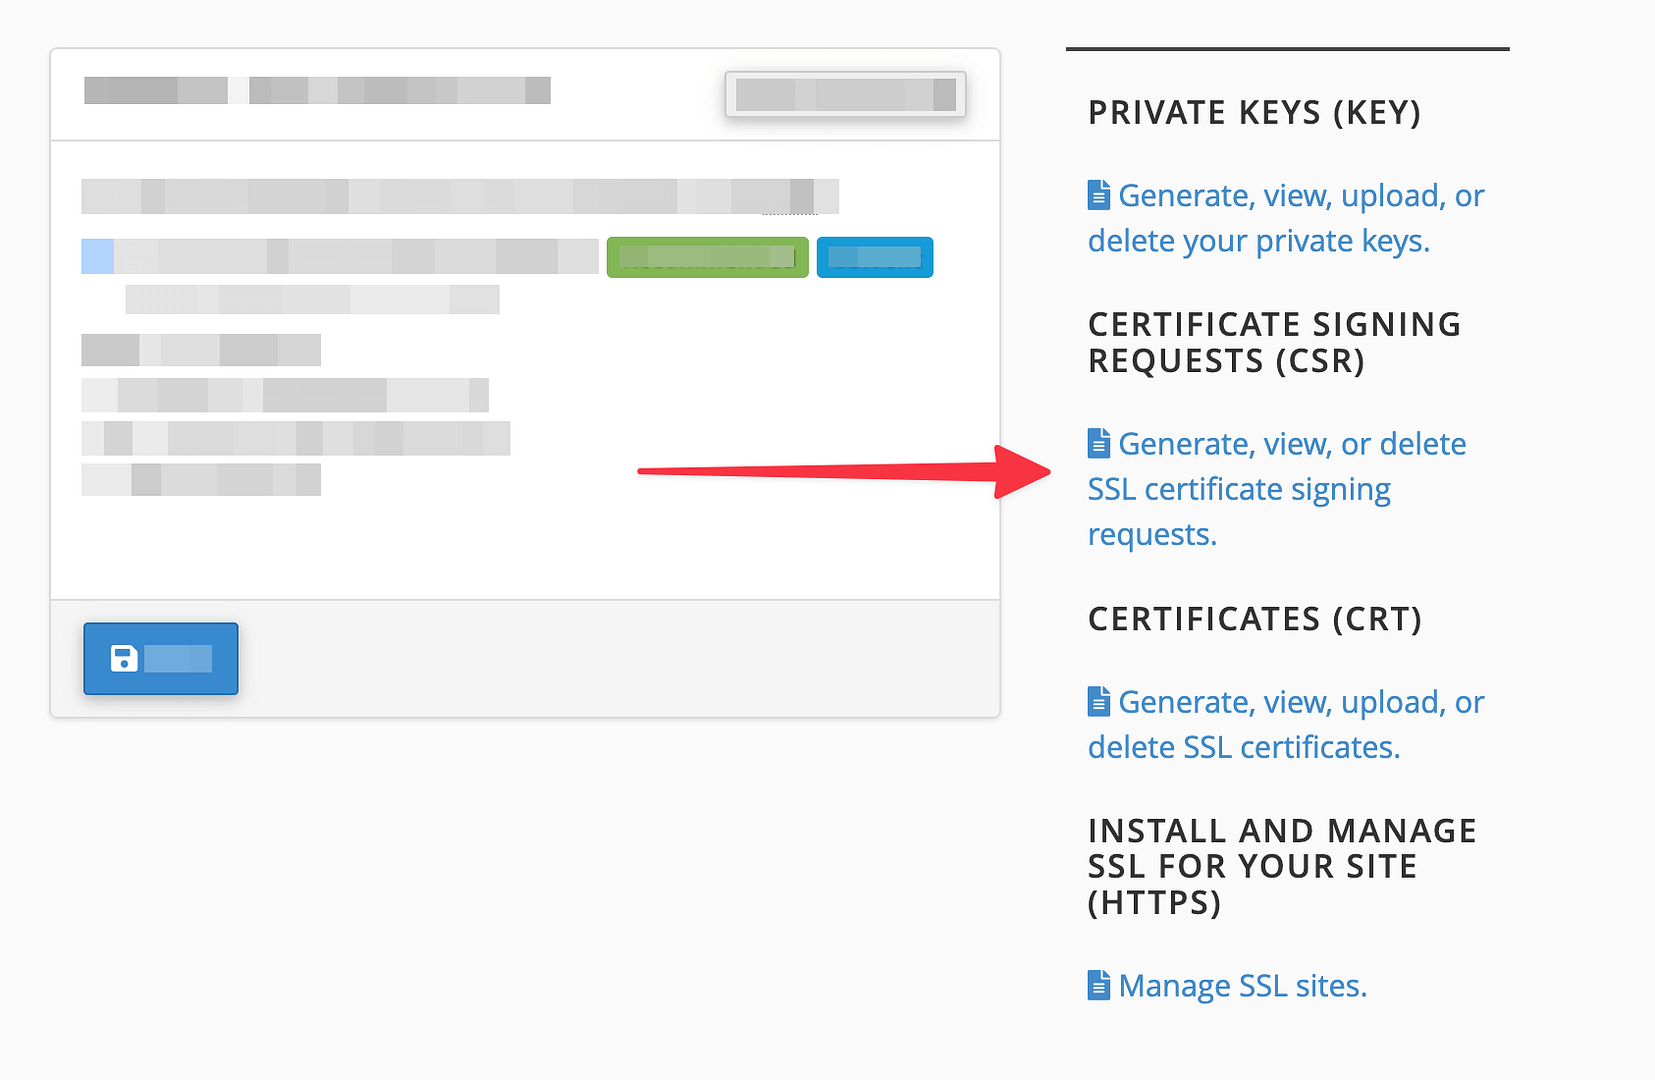
On the next screen, go for the link under Certificate Signing Requests (CSR):

On the next screen, you’ll see all your currently generated SSLs, and, at the bottom, you can generate a new CSR for any of your existing domains:

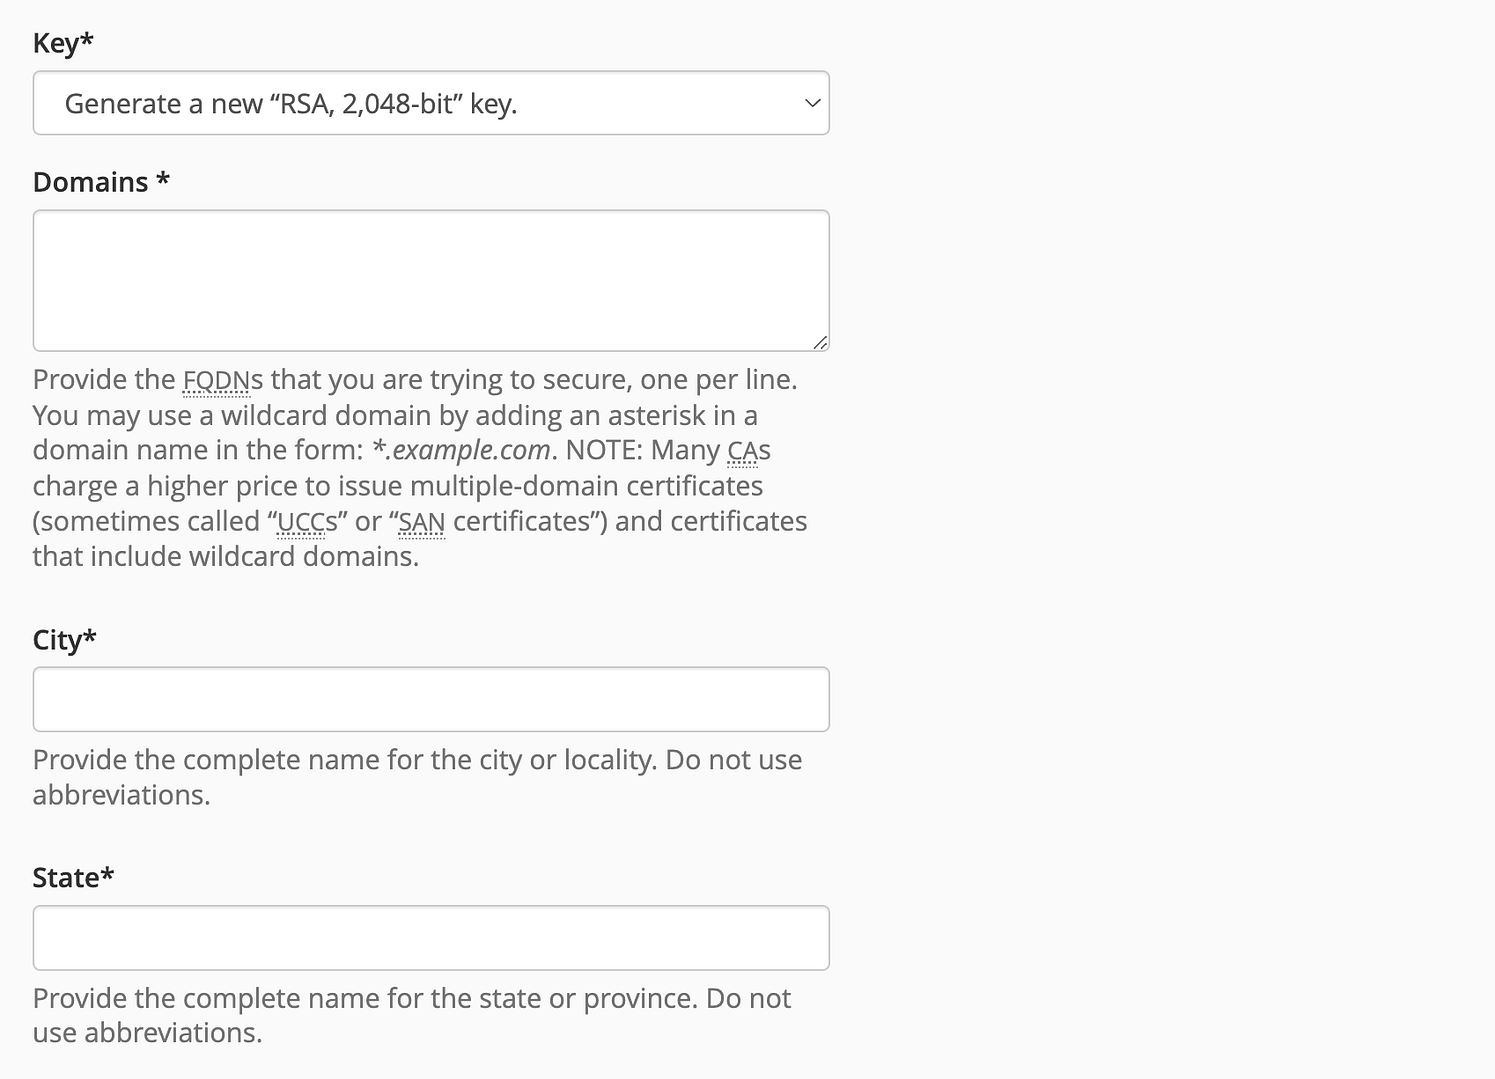
Do note that you’ll need to provide contact information to validate domain ownership. Once you fill out every field, your host will provide you with a CSR code. It’s going to look something like this:

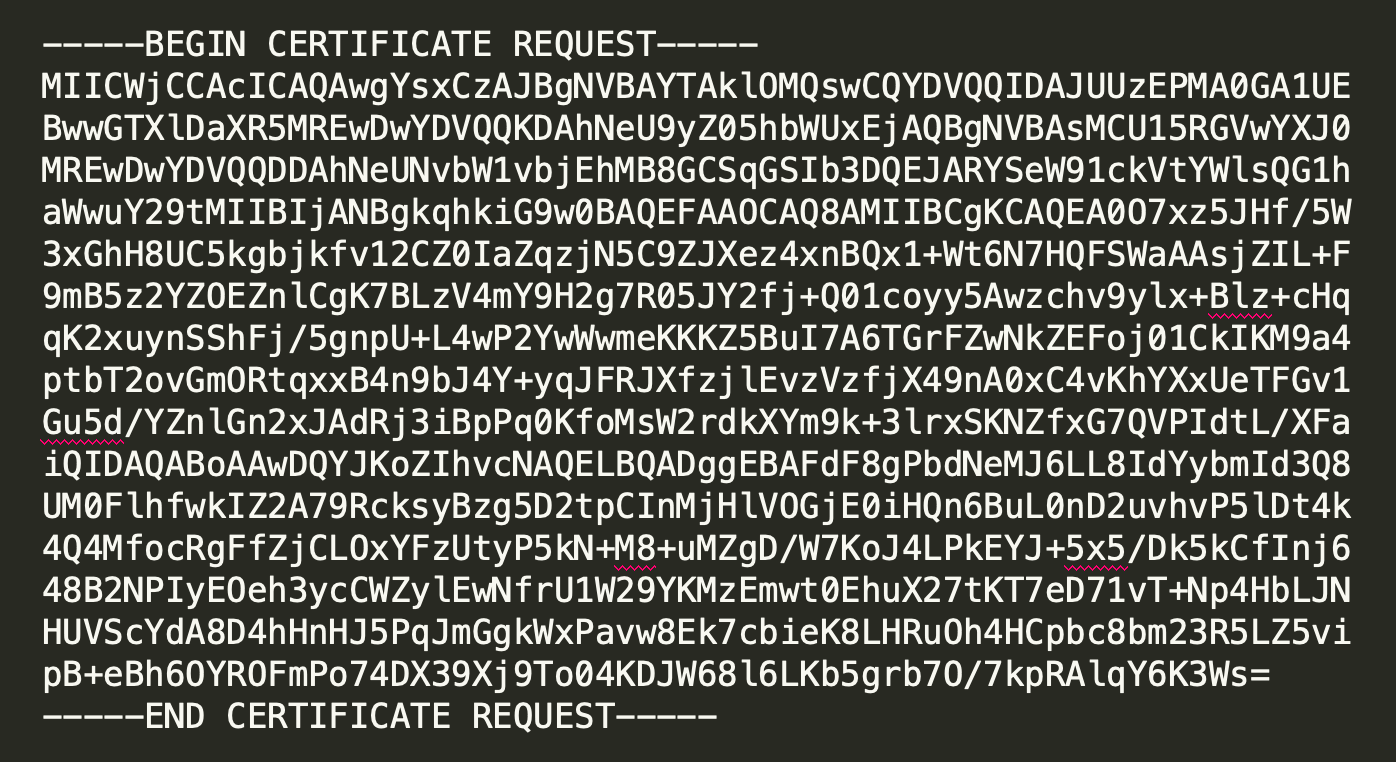
Keep this code handy because you’ll need it to re-activate your certificate.
Step #2: Submit CSR to a certificate authority of your choice
The certificate authority is a company that will issue the SSL to you. If your SSL is not from Let’s Encrypt, then other popular options include DigiCert, Comodo, SSL.com, GlobalSign.
The next step is taking your generated CSR and submitting it with the certificate authority of your choosing. The exact steps of this process will depend on the specific company. Generally, though, you will need to follow the prompts and provide all the requested information, along with your CSR.
You’ll walk out on the other side with a fresh SSL certificate that’s ready to be installed on your current hosting.
Step #3: Install your newly renewed SSL
Installing SSL certificates changes from host to host, but you can generally follow these steps:
For standard cPanel hosting:
Go to cPanel → SSL/TLS, and pick Manage SSL sites from the options available:

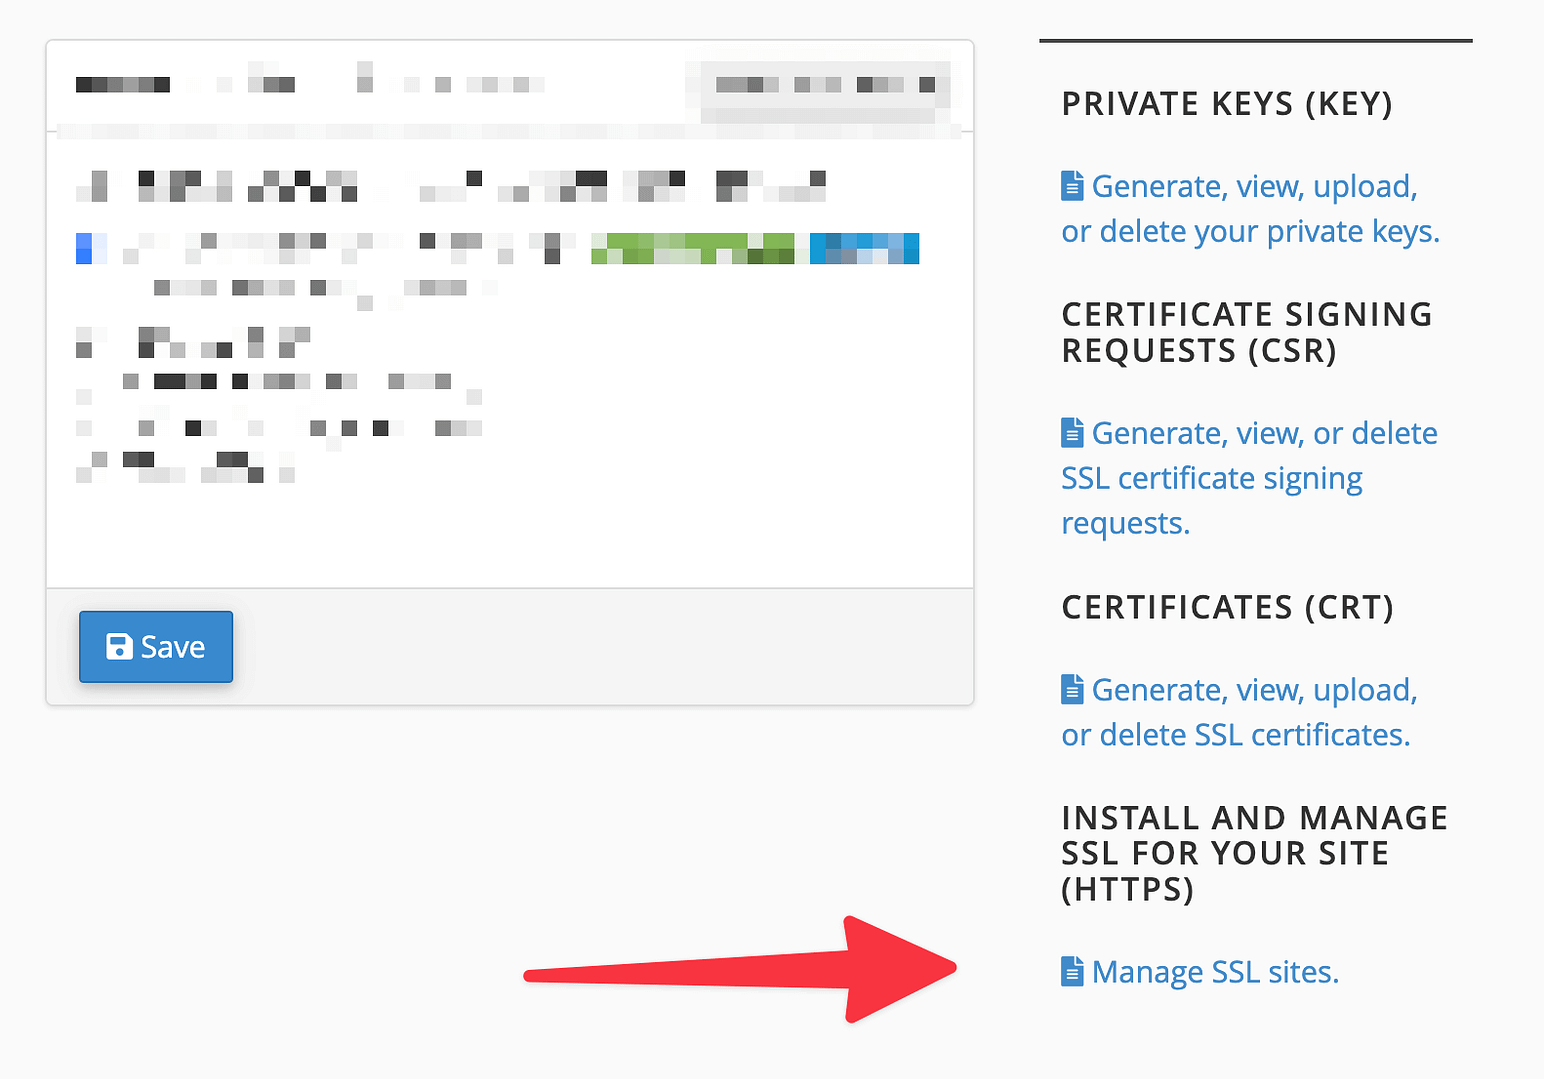
From there, you can upload the certification files provided to you by the certificate authority. In most cases, you will need these two:

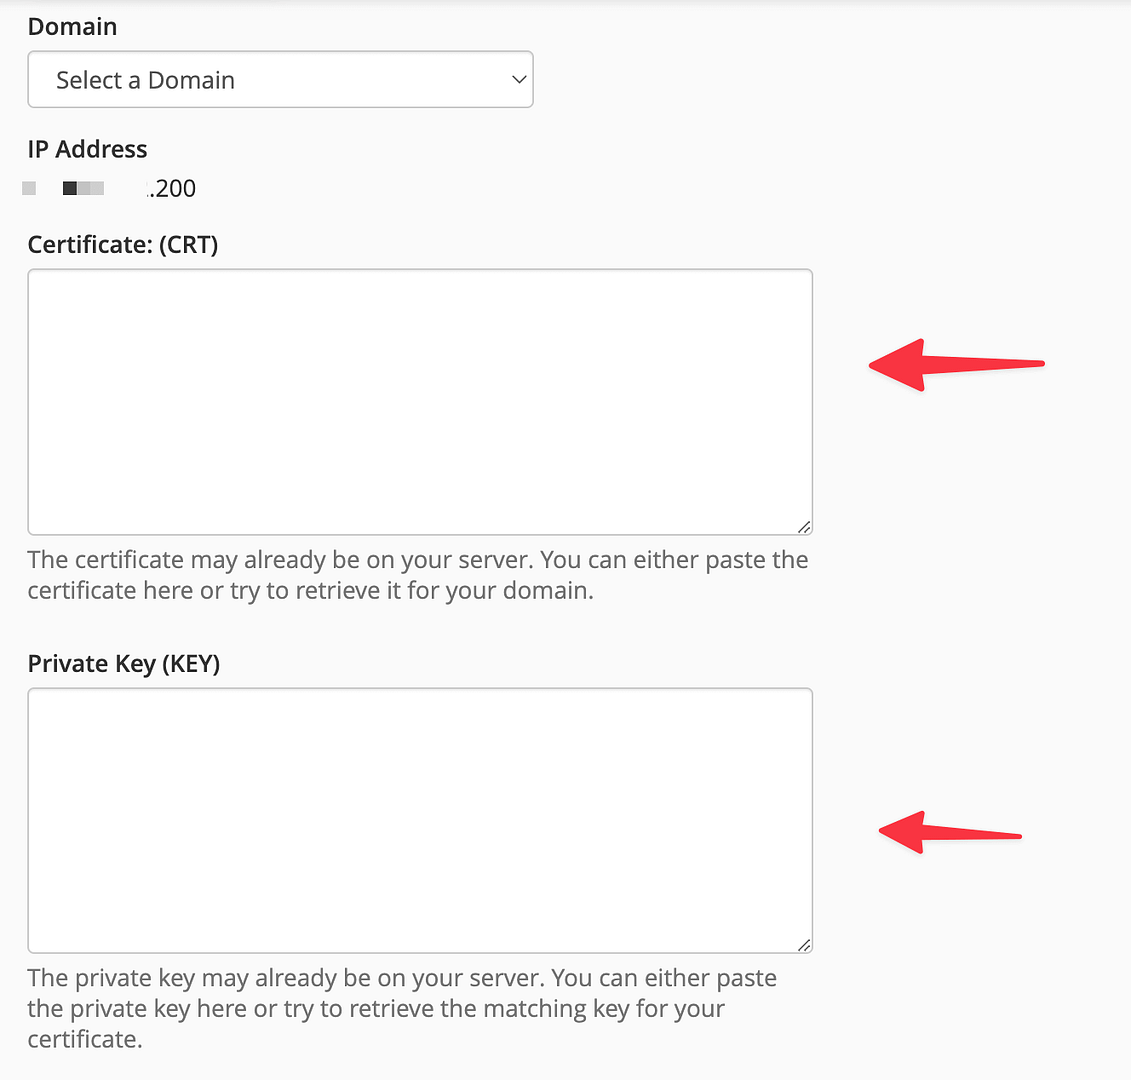
Click on Install Certificate when done. If you’re lucky, that’ll be the last time you have to renew your SSL certificate by hand!
For Bluehost:
Bluehost does use cPanel underneath its main hosting panel, but certain details sometimes work a bit differently. The fastest way to find the screen that allows you to upload a new certificate is to go to your main dashboard, then to Hosting → Security, and click on Upload SSL:

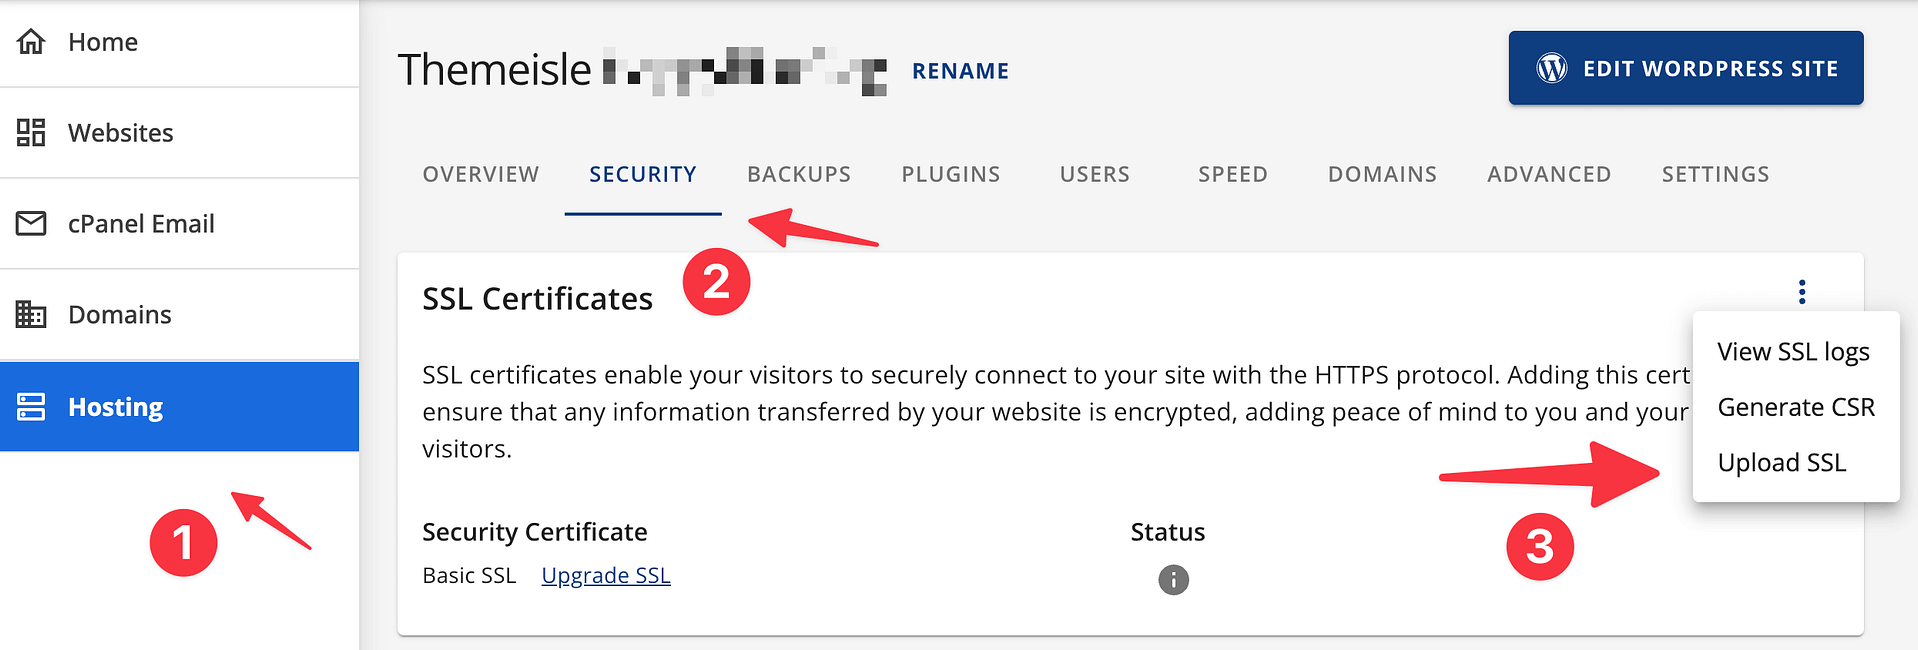
This will take you to a cPanel setup where you will be able to copy your SSL details into this field:

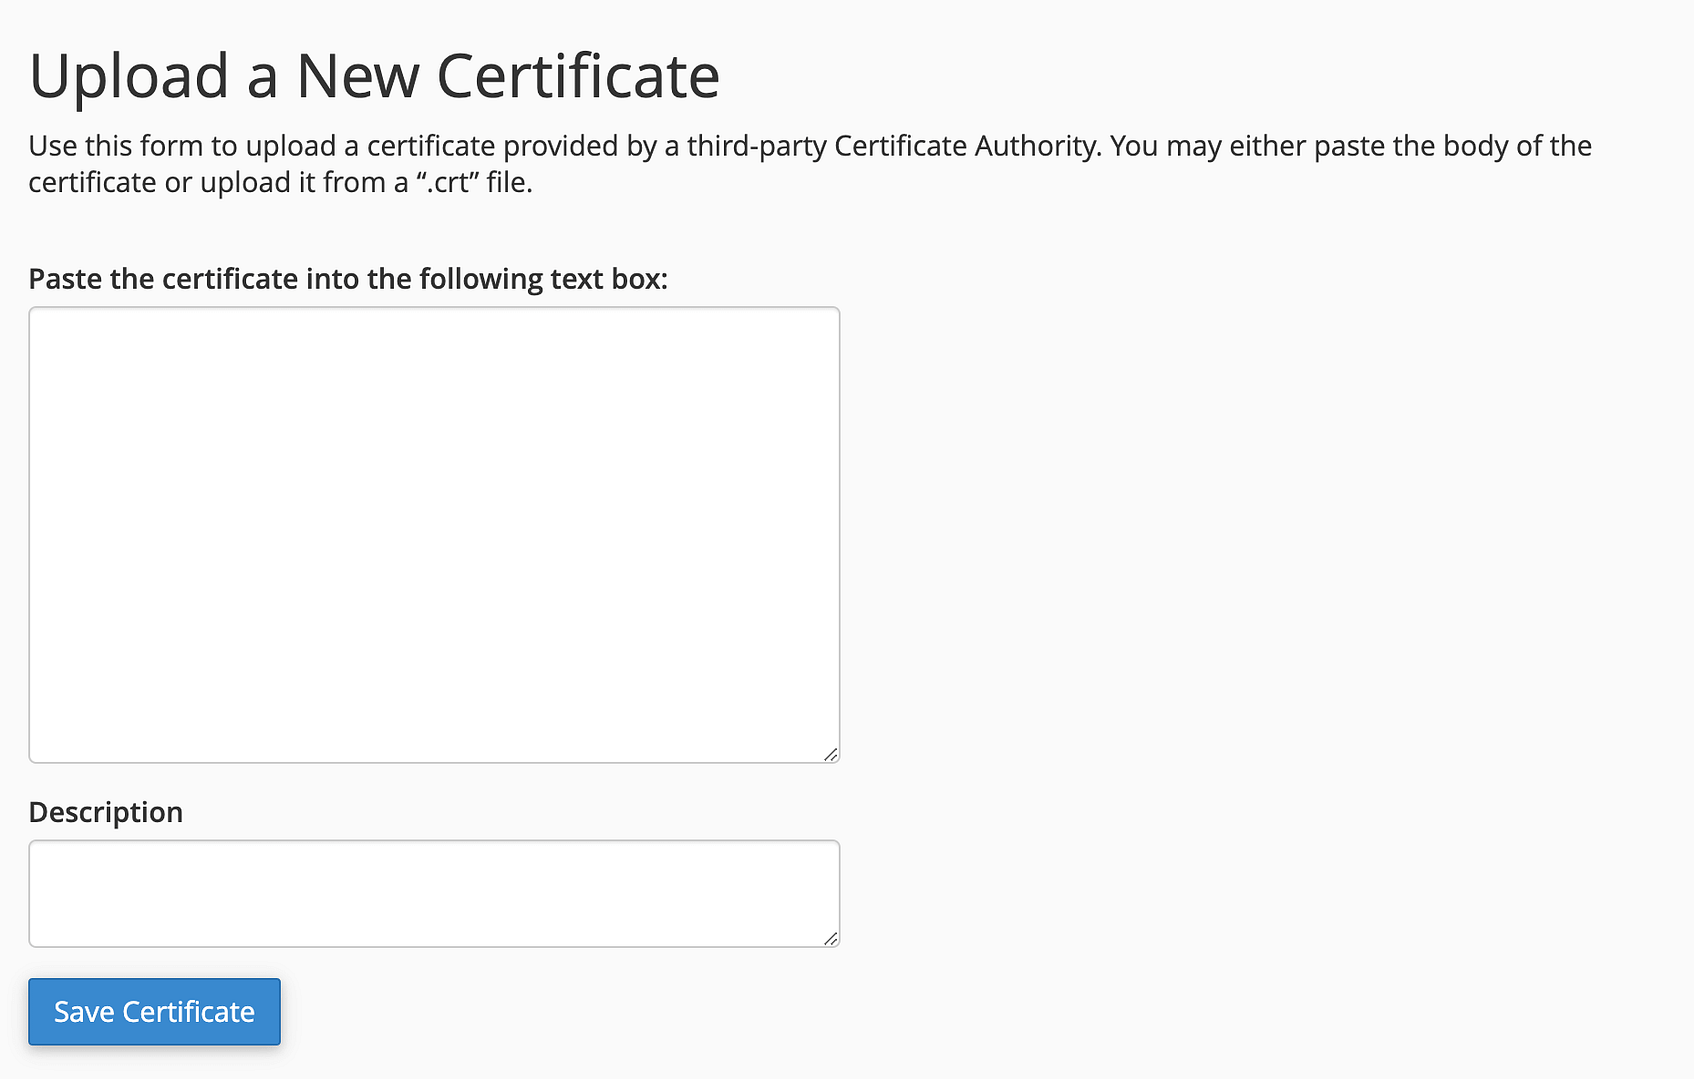
Click on Save Certificate.
Conclusion
However, the renewal process for SSL certificates can be confusing at first, and it depends highly on which certificate authority created the certificate for you.
- If your certificate was provided by Let’s Encrypt, it will renew automatically and you don’t have to do anything to make it happen.
- If your certificate was provided by another company, check in your cPanel settings if the auto-renew feature is enabled (→ here’s how)
- For certificates that need manual renewal, you can do that by generating a certificate signing request (CSR), activating your certificate with the provider of your choice, and installing it on your hosting setup (→ here’s how)
Do you have any questions about how to renew SSL certificates? Let’s go over them in the comments section below!
Yay! 🎉 You made it to the end of the article!

Leave a Reply